MyEclipse for Spring
Scaffolding Spring Web Flow in MyEclipse for Spring 9.0
A practical walkthrough of the 9.0 Web Flow scaffolding wizard, from entity selection to a running multi page journey.
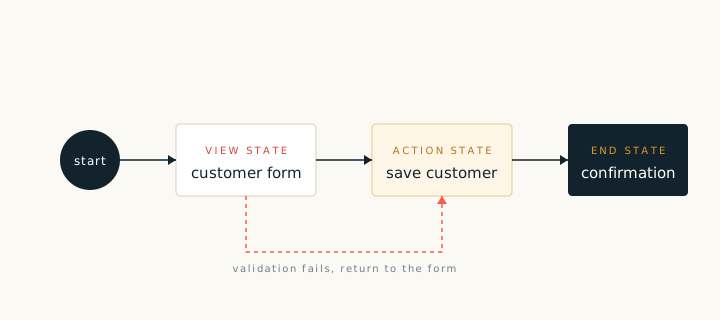
The 9.0 scaffolding wizard can generate a complete Spring Web Flow journey from a data model. It creates the views, the flow definition, the actions and the service calls. The result is a working application that can be run before any hand editing.
Before you start
- A configured data source and at least one entity.
- A project with the Spring and Web Flow libraries on the build path.
- A decision about whether each entity gets its own flow or shares a flow with related entities.
Running the wizard
- Start the Web Flow scaffolding wizard from the project menu.
- Select the data source and the entities to include.
- Choose the operations: list, show, create, edit and remove.
- Set the package names and the view folder.
- Review the blueprint and finish.
After generation
Run the application and walk the generated journey. Check the list screen, open a record, edit it and save. Then open the flow definition and match each state to the screen you just used. The flow should read like the journey you walked.
When the generated journey works, replace the sample validation with your own rules and add the fields your screens need. Regenerate after each model change so that the views and the flow stay aligned.